Enable printer sharing or disable printer sharing in Windows Vista
 By default, Windows Vista does not enable file or printer sharing, for security reasons: before you can share a printer on your local network (wired or wireless), you will need to make sure that the "Printer Sharing" networking feature is enabled. Fortunately, the process is very simple, as you'll discover in this tutorial: we will explain how to enable printer sharing to let others on your network use your printer, and how to disable printer sharing whenever you like.
Access Network and Sharing options for printers in Windows Vista
 To access the network and sharing settings for files and printers in Windows Vista, click on the Start Menu button, and click Control Panel.
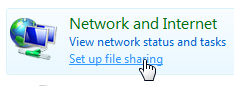 Once the Control Panel opens, locate the section labeled "Network and Internet" and click the Set up file sharing link it contains.
This link opens the "Network and Sharing Center" section of the Control Panel, from where you can not only enable or disable printer sharing, but also manage all the other resources you can make available to other users on your local network.
If you use Windows Vista's Classic Start Menu, you can directly go to Start > Settings > Control Panel > Network and Sharing Center, and you will end up straight away on the section of the Control Panel that deals with printer sharing.
Enable printer sharing in Windows Vista
Under the Network and Sharing Center, find the Sharing and Discovery section: it contains expandable sub-sections that handle various parts of resource sharing over your network.
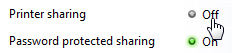 Click on the On/Off switch next to Printer sharing to expand the printer sharing options and settings: by default, printer sharing is disabled, and Turn off printer sharing is selected. Click on Turn on printer sharing, and click the Apply button.
Windows Vista will confirm your new network sharing options and, if you confirm (by clicking Continue or by typing the Administrator's password), printer sharing will now be turned on, and allow you to start right away sharing your printers over the network with other users.
Disable printer sharing in Windows Vista
To disable printer sharing, follow the exact same steps we outlined to turn on the printer sharing functionality. But this time, choose Turn off printer sharing and click Apply.
If you disable printer sharing after having started sharing a printer connected to your computer with other network users, these users will no longer be able to access and print to that printer - that is unless another network user plugs in the printer on their PC and decides to share it.
Printer sharing is enabled, but I cannot see the network printer!
The most common cause of shared printer no longer appearing on the network is simply that the computer, to which the printer is hooked up, has been turned off. In that scenario, since the printer is shared on the network through the PC, it depends on the PC to access the network.
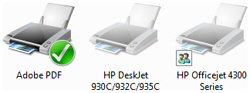 You may still be able to see the printer, since Windows Vista won't remove it from the list simply because it is (temporarily) unavailable, but you will be able to tell that the printer icon for inaccessible printers is faded out (for disconnected local printers, or for shared printers unavailable over the network).
↑ The screenshot above displays an available local printer (in this case the print driver for Adobe PDF), an unavailable local printer ("HP DeskJet"), and an unavailable network printer (or "shared printer", in this case the "HP Officejet" printer).
To avoid inaccessible shared printers, you can always connected the shared printer to a router, or to a computer or server that remains turned on most of the time.
up ↑