Crop a picture in Windows 7
 A previous tutorial explained how easily you can resize pictures in Windows 7, using the basic MS Paint graphic editor that comes with your computer; but what if you want to extract an area of an image, and use it as a new image instead? This is called "Cropping", and is very quick to do in Paint, as you'll learn in this tutorial. (You can always copy the portion of the image you are interested in, create a new image file, paste the copied crop, and then save the result as another file - but cropping directly inside Paint is faster, and much easier!)
Crop an image in MS Paint on Windows 7
Follow these simple steps to crop a picture in Paint:
- Right-click on the image file you want to crop, and choose "Open With > Paint".
 When the picture is loaded inside MS Paint, start by selecting the "Select" tool, that will be used to define the area you want to crop around. You can choose any type of selection shape, Paint is not limited to cropping only rectangular areas of an image. (Click on the Select tool's dropdown arrow, for example, and pick "Free Form Selection".)
- Note that while the area will look rectangular in all cases, Paint will have applied the proper selection type (in case you created a free form selection, and wondered why you ended up with a rectangle!)

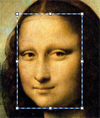
- With the area of the image still selected, as shown on the screenshot above, go ahead and click on the "Crop" button / command inside Paint's ribbon:

- As soon as you do, MS Paint crops the image and removes all portions that laid outside the selection; Paint will use your current background color for the rest of the image (by default, this is white).

- The background color (what you currently have selected as "Color 2" in Paint) only matters for free form selections and crops, since a square / rectangular cropping operation will not leave any "un-cropped" areas. Here's an example of free-form cropping with an alternate background color:

- And you can always apply the new background color around the cropped area using the paint bucket with a "Color 1" (foreground) of your choice. The screenshot below shows the Paint bucket button:

- You can now save the cropped picture as a new image file, and exit Paint to return to Windows.
Note: this tutorial also works in the versions of MS Paint that shipped with Windows Vista and Windows XP, but you will find the crop commands under the "Edit" menu (from memory).
up ↑