Rotate a picture in Windows 7: Counter/Clockwise, or Flip Horizontally / Vertically
Depending on how you took a picture with your digital camera, it could be rotated in the "wrong" direction - taken in portrait mode when you want it in landscape, or the reverse. The orientation of an image you found online may also be reversed (flipped horizontally or vertically). In this tutorial, you will learn how to rotate back an image in the right orientation, and how to flip a picture to get the result you want: all this can be done without having to download any additional software, since Windows 7 comes with MS Paint (or "Paint", for short), which lets you do all that!
Open the file, and optionally select the area to rotate or flip
Start by opening the picture in question inside Paint: the easiest way is to right-click on the image file, choose "Open With", and then select "Paint" from the submenu:
![]() Once the file is opened in Paint, make sure that the "Select" tool is the current one - otherwise you will accidentally draw on the picture, rather than show the menus you will need. If you want to rotate or flip the entire picture, do not select anything: you are ready to proceed; if you want to only rotate or flip a portion of the image, first drag with the Select tool to select that area.
Once the file is opened in Paint, make sure that the "Select" tool is the current one - otherwise you will accidentally draw on the picture, rather than show the menus you will need. If you want to rotate or flip the entire picture, do not select anything: you are ready to proceed; if you want to only rotate or flip a portion of the image, first drag with the Select tool to select that area.
Rotate an image in Windows 7 (to Portrait or Landscape)
Follow these steps to rotate a picture in Paint:
- Now that the graphic file is opened inside Paint, right-click anywhere on the image, and choose "Rotate" from the context menu.
- Paint will then display the rotate options you have in a context menu:

- Choose "Rotate right 90°" to rotate the image clockwise by "15 minutes" (a quarter of circle). "Rotate left 90°" will rotate a quarter counterclockwise. To rotate the picture a full half-circle (and the top down, and bottom up), select "Rotate 180°" instead.
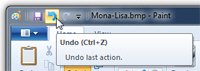
- MS Paint will apply the change, and Windows 7 will display the results right away: if you want to revert to the original image, press Ctrl+Z on your keyboard to undo (or click on the "Undo" button). Press Ctrl+Y (or click on "Redo") to re-rotate, and switch back and forth between the two orientations.
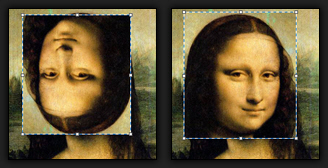
- If you selected an area of the image before rotating, it alone will have changed (as shown on the screenshot below). Otherwise, Paint will have rotated the entire picture.

Flip an image in Windows 7 (Horizontally or Vertically)
And here's how you flip a picture inside MS Paint:
- Again: to flip the entire image, don't select anything; now right-click anywhere inside the picture.
- To flip just a portion of the picture, select it first; and then right-click inside the selected area.
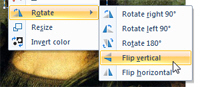
- Click on the "Rotate" submenu like before, but then choose "Flip Vertical" or "Flip Horizontal". The screenshot below shows the effect and result of flipping horizontally or vertically a selected area of an image: without selecting anything beforehand, the entire picture will be flipped for you.
And once you have flipped or rotated the picture, or a selected portion of the image, you can save your changes (press Ctrl+S or click on the "Save" button), and the file is modified accordingly!
Note: this tutorial also works in Windows Vista and Windows XP, but the Rotate and Flip commands will be under the Edit menu.
up ↑