Remove/Delete a printer in Windows 7: Uninstall printers and print drivers
As soon as you connect a printer to your Windows 7 computer, or install a print driver on your PC, it will be added to your list of installed printers, and made available in the Print dialog whenever you are about to print a document or picture. This can easily get in your way if you keep seeing a printer that has long been unplugged and used elsewhere. This is especially true if the printer that is no longer available was set as your default printer, since you'll need to manually choose the printer you want as default (another tutorial will explain how to set or change your default printer in Windows 7).
Uninstall a printer or print driver in Windows 7
Follow these steps to completely remove a printer from your computer (note that you can always add it back at a later time - in the case of USB printers, all you have to do in the vast majority of cases is just plug the new printer to your computer, and Windows 7 will do the rest, namely adding any drivers you may need). Let's now show you how to access your printers to remove one of them:
- Open the start menu, and type "printer" in the search field; you can now click on either of the first links "(View) devices and printers": (most likely the same top results you'll get in your start menu)

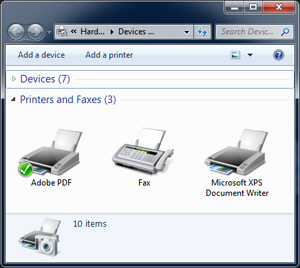
- When you do, Windows 7 will open the Control Panel, with the "Devices and Printers" screen preloaded - at the top, general computer peripherals will be listed (and you can collapse that list as we've done in the screenshot below), and next all your printers and print drivers showing under "Printers and Faxes". (In our case, we only have two print drivers currently configured.)
- To delete and remove a select printer or print driver from your PC, just right-click on its icon, and choose "Remove device" from the context menu that opens:

- To avoid accidental deletion of printers, Windows 7 will first display a confirmation message: click "No" to cancel and abort without deleting the selected printer, or click "Yes" to proceed and remove any reference to that printer from your PC.
- Note that removing a printer or print driver requires "administrative privileges" - in other words, you either need to be currently logged in as an administrator, or be able to supply the administrator's password when Windows 7 asks for it.
- Once done, you can close the Control Panel to return to Windows 7.
Once you have finished removing the printer / print driver from your computer, try pressing Ctrl+P while on this tutorial page (this is the universal keyboard shortcut on Windows to print the current document). The "Print" dialog will appear, and include a dropdown menu with a full listing of printers and print drivers your computer recognized. The printer you just removed should no longer be visible from the list (at any rate, will be hidden from that list the next time you logoff or restart your computer, but that should not be needed).
up ↑