Change your profile picture in Windows 7 (User account image)
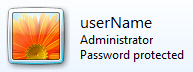 Whenever you create a user account (Windows profile), Windows 7 automatically assigns randomly an account picture, an image that is displayed next to your profile on (for example) the Windows logon screen. In this tutorial, we will explain how to change your profile picture in Windows 7, either by choosing from one of the 36 pictures that ship with Windows 7, or by using your own custom picture!
- In this Windows 7 tutorial:
- Change your profile picture
- Use a custom picture for your profile
Change your profile picture in Windows 7
We will first show you how to change your Windows profile's picture using one of the "built-in" images, the 26 pictures that ship with Windows 7. Follow these simple steps:
- Open the start menu, and type "user account" inside its search field
- Click on the result link that says "User Accounts" to access all Windows profiles on your computer
- Windows 7 opened the "Make changes to your user account" screen inside the Control Panel
- We assume that you want to change your own profile picture (To change another profile's picture, simply click on "Manage another account" and double-click on the user account whose profile you want to change, and go from there, using the "Change the picture" link.)
So, to change your own Windows profile's picture, click on the "Change your picture" link - Windows 7 loads in the next screen all the built-in images you can choose for any Windows profile:
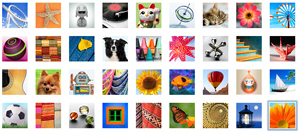
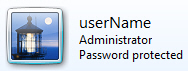
Click on the image you want to use as profile picture, and click on the "Change picture" button. - Windows 7 brings you back to the user account profile page, this time with an updated profile picture displaying next to the user name: you are done changing the picture!
Exit from the Control Panel to return to Windows: the next time you or someone else loads the user accounts screen, they will see your new picture. Likewise, the image you just picked for your profile will be displayed (for everyone to see) on the Windows 7 logon screen (visible when Windows loads, when you have locked your computer, or when someone chooses to "switch user").
Use a custom picture as image for your Windows user account
As mentioned earlier in this tutorial, Windows 7 lets you use a custom picture for your profile as well; we showed you how to change your profile picture the standard way, we will now explain how to pick an image from your computer and use it as profile picture:
- Open the start menu, and type "change picture" in the search field
- Then click on the "Change your account picture" link that should have appeared at the top
- Windows 7 directly opened the "Choose a new picture for your account" screen in the Control Panel
- This time, instead of clicking on one of the standard pictures, click on the "Browse for more pictures" link displayed below the usual listing of Windows images.
- Windows 7 will open an Open dialog, that lets you find images or photos from your computer; once you have found a picture you'd like to use for your profile, double-click on it (this is the quick way).
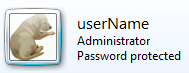
- Windows 7 automatically selects the image, applies it immediately as your profile picture, and brings you back to the "Make changes to your user account" screen; notice that your profile now displays the custom image you just picked: (including in the start menu user photo)
And there you have it! Whether you use one of the Windows images for your profile, or decide to pick a custom profile picture, it is all done from the same place; and, if you are not trying to change someone else's user account, you can directly access the right screen in the Control Panel by typing "change picture" in the start menu - it doesn't get any easier.
up ↑