Change your user name in Windows 7 (Rename your profile)
When you first run Windows 7, you have to choose a name for the primary account (Administrator); whenever you add Windows users, you also have to choose a display name for their profiles. But what if you want to change a Windows profile's name later on? Fortunately, this is not only possible, but quite easy. This tutorial will explain how to rename a profile (change the user's name) in Windows 7.
Rename a Windows profile in Windows 7
Follow these steps to rename a Windows profile (yours or someone else's).
- First, open the start menu
- In the search field, type "add user account" (we will not add a user, but this is the quickest way to show all Windows profiles on your computer)
- Click on the "Add or remove user accounts" link that appeared in the results
- Windows 7 has now opened the Control Panel, and a listing of all existing users
- Double-click on the user profile you want to rename
- The next screen shows all option for this particular profile: click on the "Change the account name" link to rename the selected profile
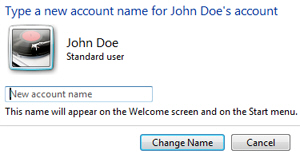
- Windows 7 will open the "Type a new account name for [Windows user]'s account" screen:

Under the "New account name" field, type the new first name, last name, or nick name to which you want to rename this profile. - Once you have chosen a new name (and double-checked it for spelling and typos), click on the "Change Name" button
- Within a second, Windows 7 renames the user account and brings you back to that profile's page, where you can now see the new name.
And this is how you rename a profile in Windows 7, or change the name of another user account.
Depending on how some software operates (e.g., if they rely on your current Windows user name), you may face a few warning messages when you first use them - but this is very unlikely. Most software accesses your preference files "anonymously", and is indifferent to your actual Windows profile name.
up ↑