Enable / Show Quick Launch in Windows 7 Taskbar
Because Windows 7 comes with the new ability to pin and unpin programs to the taskbar, Microsoft has disabled the "Quick Launch" functionality by default: this means that Quick Launch is hidden from the taskbar, but can be re-enabled a just a few simple steps. Since the Quick Launch functionality is just a special case of adding a folder as taskbar toolbar, you can very easily re-enable Quick Launch in Windows 7; this tutorial explains how to do just this, how to add shortcuts to Quick Launch (and remove them), and how to disable Quick Launch in Windows 7. A separate tutorial also shows you how to make the Windows 7 taskbar look like Windows XP or Windows Vista.
- In this Windows 7 tutorial:
- Add Quick Launch to the taskbar
- Add shortcuts to Quick Launch (drag-n-drop or Windows Explorer)
- Remove shortcuts from the Quick Launch toolbar
- Disable Quick Launch from the Windows 7 taskbar
Add Quick Launch to the taskbar
Follow these simple steps to adding Quick Launch to the Windows 7 taskbar:
- Right-click on an empty area of the taskbar, and choose Toolbars
- From the Toolbars submenu, click on "New Toolbar"
- Windows 7 will open the "New Toolbar - Choose a Folder" dialog
- In the "Folder" text field at the bottom, type or paste the following line, and then hit Enter:
%appdata%\Microsoft\Internet Explorer\Quick Launch - Your Windows 7 taskbar will now look something like this:

- Right-click on "Quick Launch", and uncheck the "Show Text" menu item: this tells Windows 7 not to show the name of each shortcut, and display instead only the icons of programs you add to the Quick Launch bar / toolbar.
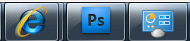
- If you are using large icons in your Windows 7 taskbar (like the screenshot below), you will want to make Quick Launch use large icons as well: right-click on the word "Quick Launch", and choose View > Large Icons. Large icons are the default, and look like this, size-wise:
- Right-click again on "Quick Launch", and this time uncheck "Show Title" from the menu: this instructs Windows 7 not to display the "Quick Launch" words in the taskbar.
 Finally, move the Quick Launch bar all the way to left, next to the start menu (although this is a just a matter of preference: most right-handed people will probably find easier to get accustomed to using Quick Launch on the right of the taskbar).
Tip: if you cannot move the Quick Launch toolbar left or right, this is probably because your taskbar is currently locked - just right-click on it, and uncheck "Lock the taskbar". Now you can move the Quick Launch bar to the left! (As was the case in previous versions of Windows, like Windows XP or Windows Vista, and even earlier.)
And this was literally all it took to show Quick Launch in Windows 7 on the taskbar! We chose to show you how to add the actual Quick Launch folder, but realize that you could have achieved the exact same effect by adding another folder, and putting shortcuts to programs inside that folder. In other words, Windows 7 doesn't really care if you use the "real" Quick Launch folder for your Quick Launch functionality, or if you use another folder of your choice.
Add shortcuts to Quick Launch in Windows 7 (programs, files, or folders)
Now that you have added Quick Launch to Windows 7, time has come to put icons (shortcuts) inside the Quick Launch bar: there are two ways to do this, it boils down to what you feel most comfortable doing - both approaches have exactly the same final effect.
Drag and drop shortcuts in the Quick Launch toolbar
You can now drag program icons from the desktop, and drop them in the Quick Launch area to add them; another way is to drag program icons from the start menu, and drop them between icons you already have inside your Quick Launch folder / toolbar.
Add programs to Quick Launch through Windows Explorer
Another way is simply to right-click on the Quick Launch area (not an icon it may contain), and choose "Open Folder" - or paste "%appdata%\Microsoft\Internet Explorer\Quick Launch" inside the start menu search box and hit Enter - exactly the same effect!
Remove shortcuts from the Quick Launch toolbar
To remove a shortcut from the Quick Launch toolbar in the Windows 7 taskbar, just proceed as you did in Windows XP or Windows Vista (for example). Right-click on the shortcut you want to delete, and choose "Delete" from the context menu - and confirm by clicking on the "Yes" button.
This will place the shortcut you removed inside Windows' Recycle Bin, from where you can restore it quite easily (recovering deleted files will be explained in details in a later tutorial).
Disable Quick Launch from the Windows 7 taskbar
Just like with previous versions of Windows, you can easily disable Quick Launch in Windows 7: to do so, simply right-click on an empty area of the taskbar, and choose "Toolbars" from the menu. You will see that "Quick Launch" is listed in the submenu, with a checkmark displayed next to it.
Just click on Quick Launch to hide (disable) it temporarily, and Windows 7 will remove it from the taskbar. If you decide to enable Quick Launch again in the future, just follow the steps we outlined at the beginning of this tutorial.
Note: Windows 7 will not modify the content of your Quick Launch folder even if you disable it. This means that if you decide to re-enable Quick Launch on the taskbar later on, all your shortcut icons will already be there, no need to start from scratch!
up ↑