Add a shortcut to a folder on the Windows 7 desktop
Whenever you need frequent access to a folder in Windows 7, the easiest way is either to create a link to it in your "Favorites" location in Windows Explorer, or to add a shortcut to it on the desktop. In this tutorial, we will show you three ways to quickly add shortcuts to folders on your desktop.
Place any folder as a desktop shortcut
Here's the most intuitive way to proceed: (which also works in previous versions of Windows).
- First, open Windows Explorer and navigate to the "containing folder" (the folder in which resides the folder you are interested in). Once you see the folder in question, right-click on it and choose "Create shortcut" from the context menu, as shown on the screenshot below:

- At this point, one of two things will happen: first scenario, you are inside a regular folder, and Windows 7 will add a shortcut to the selected folder inside the same containing folder. From there, just right-click on the new shortcut, right-click to choose "Cut", and then paste the folder shortcut on your desktop (press WindowsKey+M to minimize all windows, and Ctrl+V to paste the shortcut).
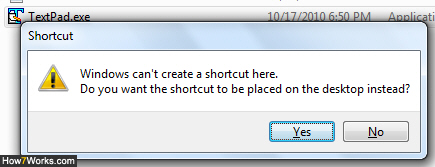
- If the folder to which you want to create a shortcut is inside a special, or "protected" operating system folder, like "Program Files", Windows 7 will prevent you from placing a shortcut inside that folder; in that case, it will display the following confirmation message: "Windows can't create a shortcut here. Do you want the shortcut to be placed on the desktop instead?".

- Since Windows 7 cannot create shortcuts inside system folders, click "No" and nothing happens, or click "Yes" and your shortcut will appear directly on your desktop!
Both techniques achieve exactly the same effect, but here's yet another trick you can use:
Creating shortcuts through the Send To menu
Finally, Windows 7 offers another way to make a shortcut to a file or folder by using the "Send To" menu. Simply right-click on any file or folder, regardless of its location, and choose "Send To" from the context menu; then, choose "Desktop".
Note: your desktop should by default be displayed inside the Send To menu; if this is not the case, stay tuned for a later tutorial that will explain how to add or remove locations from the Send To menu! (Hint: type "%APPDATA%\Microsoft\Windows\SendTo" in the start menu!)
up ↑