Remove Explorer from the Windows 7 taskbar + how to view folder content
By default, Windows 7 comes with a Windows Explorer shortcut pinned to the taskbar, much like older versions of Microsoft's operating system had an Explorer icon inside the Quick Launch area. As you may know from earlier tutorials, you can very easily pin or unpin programs from the taskbar; in this tutorial, you will learn how to unpin Windows Explorer from the taskbar, and how to access it when it is no longer visible in that area of the screen. Depending on your screen resolution and the number of applications you'd like visible at all times in the taskbar, this gives you room for one more icon!
- In this Windows 7 tutorial:
- Remove Explorer from the taskbar
- Launch Windows Explorer without the taskbar
Unpin and temporarily delete Windows Explorer from the taskbar
First, let's remove the Windows Explorer icon from the taskbar:
- If you have set Windows 7 to automatically hide the taskbar, move your mouse pointer (cursor) above its area to slide it back to view (otherwise, skip this step).
- Then, right-click on the Windows Explorer icon and choose "Unpin this program from taskbar" from the jump list (context menu), as shown on the screenshot below:

- As soon as you do, Windows 7 will hide the Explorer icon, and slide all other pinned programs one step to the left. You are done, and that's all you need to hide Explorer from the taskbar!
Tip: to restore Windows Explorer to the taskbar later on, just launch it with one of the techniques described below, and right-click on its icon (taskbar button) just as we showed you above, and this time pick "Pin this program to taskbar" from the jump list:
How to launch Windows Explorer without the taskbar
Since Windows Explorer is an application tightly integrated with Windows 7, there are quite a few built-in ways to launch it; of the methods mentioned below, pick your favorite or the one best suited for a particular situation - all achieve the same effect:
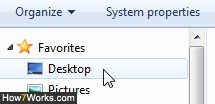
- The easiest way to launch Windows Explorer is to double-click on a folder on your desktop; the selected folder and the files it contains will automatically be displayed on screen, inside Explorer. From there, you can navigate to one of your libraries (Documents, Downloads, Pictures, etc.) or pick one of your Favorites folders, like the Desktop in this screenshot:
- Another way to launch Explorer without its taskbar icon is to right-click on the start button, and choose "Open Windows Explorer" from the context menu. This technique, and the two explained below, will both launch Explorer for its default location, which is "My Computer" - you'll see a listing of drives (internal and external), and your favorite folders and libraries on the left hand side.
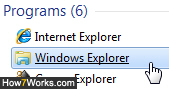
- A third way to launch it is to type the word "explorer" inside the start menu's search field, as you do to launch other applications (note that Windows 7 stores by default a shortcut to it under "All Programs > Accessories > Windows Explorer" in the start menu).
- Finally, you can open Windows Explorer by pressing the keyboard shortcut of "WindowsKey+E" (press and hold down the Windows logo key on your keyboard, and press "E" - as in Explorer).
These are just some of the most common ways to launch Windows Explorer without using its taskbar icon, but there are quite a few others, done either from within some applications, using the command line, etc.
up ↑