Rename my computer in Windows 7
When you first install and run Windows 7, you will be prompted for a name for your computer; the name you pick does not matter much until you decide to setup a network (wired or wireless) of which your Windows 7 computer will take part. When you join a network, your computer name will be visible by all, and should therefore be descriptive (and ideally non-offensive!) In this tutorial, we will explain how to rename your computer in Windows 7 (change the name of "My Computer" mostly to be used and seen on your home network).
Change the name of your computer in Windows 7
Windows 7's new start menu makes most administrative tasks a breeze; what used to be buried inside menus and submenus inside the Control Panel can now be accessed with a few keystrokes, from the start menu's search field. Follow these steps to rename your computer:
- Open the start menu, and type "rename computer" in the search field
- Windows 7 will list results by order of relevance; click on the "Rename this computer" link
- The System Properties window will open, with the Computer Name tab selected
- Locate the "To rename this computer or change its domain or workgroup, click Change" section; then, simply click on the "Change" button on the right.
- Under "Computer Name" type the new name (and avoid spaces and non-alphanumerical characters)
- Click "OK" to apply the change
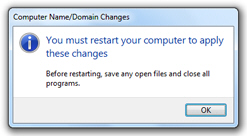
- Windows 7 will display the Computer Name/Domain Changes dialog, confirming that you have successfully renamed your computer. Click OK to dismiss this dialog

- And then click OK to close the System Properties window.
- Windows will display a message box that reads "You must restart your computer to apply these changes", with a Restart Now and a Restart Later button.
The next time you logon to Windows, after having restarted your computer, it will use its new name.
up ↑